0.引言 近日,见他人之博客存有线路切换之功能,心生仰慕,制作一个加于侧栏,此之途中曾遇诸多艰难,遂作此文以记之。(狗头保命,文言语法只是觉得好玩不喜勿喷,说正经的)widget.yaml实现自定义,直接上手
1.上手 根据Butterfly主题文档,配置自定义边栏需要修改项目目录的source/_data/widget.yml,配置格式如下:
1
2
3
4
5
6
7
8
9
10
11
12
13
14
top: - class_name: id_name: name: icon: html: bottom: - class_name: id_name: name: icon: order: html:
top: 創建的 widget 會出現在非 sticky 區域(即所有頁面都會顯示)
(取自Butterfly主题文档)
我想让我的卡片在所有页面展示以便访客方便地在任何页面轻松切换,所以我选择在top下创建卡片,编写一下切换功能的yaml,配置名字和html即可完成创建,icon和order还有id_name我暂时懒得配置也没这需求,就只配置name和html了,展示一下代码写法:
1
2
3
4
5
top: - name: 线路切换 icon: order: html: <iframe src="/static/route.html" loading="lazy" style="width:100%; border:none; height:100%;"></iframe>
这样就可以了,我选择通过iframe引入html页面来完成引入资源,因为yaml使用多行需要使用|作为标识符且yaml对于缩进高度敏感,配置过于繁琐且容易出现各种bug,就这样写了,html代码稍后给出。
1.2 编写html代码 我观察别人的博客发现线路切换页面会展示延迟信息,简单研究了测算方法,对目标服务器发送一个HTTP请求,为了防止CORS问题并尽可能地反映HTTP连接本身的延迟,我选择使用一个仅包含HTTP头作为返回数据的HEAD请求,延迟的计算方式是通过performance.now获得测速前和测速后的时间,然后相减就能得到HTTP请求发出时到收到HTTP响应包的延迟,这个延迟也叫做真连接延迟(Time to First Byte/TTFB) ,它能够精确地反映出HTTP连接的延迟。之后需要通过js操作DOM渲染出延迟的数字。
所以,我需要编写一套逻辑,大致如此。
拿到需要测速的URL –> 记录此时的时间 –> (与此同时)使用fetch发送一个类型为HEAD的HTTP请求 –> 等待对端服务器给出响应 –> 收到响应时记录此时的时间 –> 将收到返回包时的时间和发出时的时间相减 –> 得出真连接延迟 –> 通过js操作DOM来渲染延迟
编写代码,我将需要测速的URL硬编码在了代码中,优点是简单且HTTP请求更少,但缺点是扩展性不够强,未来可能会更新。
1
2
3
4
5
6
7
8
9
10
11
12
13
14
15
16
17
18
19
20
21
22
23
24
25
26
27
28
29
30
31
32
33
34
35
36
37
38
39
40
41
42
43
44
45
46
47
48
49
50
51
52
53
54
55
56
57
58
59
60
61
62
63
64
65
66
67
68
69
70
71
<!DOCTYPE HTML > <html > <head > <meta charset ="UTF-8" > </head > <body > <ul id ="f353cfd3-2666-4e6a-8610-8c23a007a0a9" style ="list-style:none; padding:0; margin:0; display:block;" > </ul > <script async > const servers = [ { n : "主站" , u : "https://url.a" }, { n : "Cloudflare" , u : "https://url.b" }, { n : "EdgeOne" , u : "https://url.c" } ]; function ping (url ){ return new Promise ((resolve ) => { const t = performance.now (); fetch (url, { method : "HEAD" , cache : "no-store" }) .then (() => { const delay = Math .round (performance.now () - t); resolve (delay); }) .catch (() => { const delay = Math .round (performance.now () - t); resolve (delay > 10000 ? null : delay); }); setTimeout (() => resolve (null ), 10000 ); }); } function getDelayColor (delay ) { if (delay === null ) return '#800000' ; if (delay < 500 ) return '#003300' ; if (delay < 1000 ) return '#006600' ; if (delay < 2000 ) return '#999900' ; return '#555555' ; } (async ()=>{ const ul = document .getElementById ("f353cfd3-2666-4e6a-8610-8c23a007a0a9" ); servers.forEach ((s,i )=> { const sub = window .parent .location .pathname ; const jumpURL = s.u + sub; const li = document .createElement ("li" ); li.innerHTML = `<a href="${jumpURL} " target="_parent" rel="noopener noreferrer" style="display:flex; justify-content:space-between; align-items:center; background-color:#49b1f5; color:#FFFFFF; text-decoration:none; padding:6px 15px; border-radius:4px; font-weight:500; transition:all 0.2s ease; box-shadow:0 1px 3px rgba(0,0,0,0.1); margin-bottom:8px;">${s.n} <span style="background-color:#800000; padding:2px 8px; border-radius:10px; font-size:0.9em;">检测中</span></a>` ; ul.appendChild (li); }); const buttons = ul.querySelectorAll ('li a' ); const res = await Promise .all (servers.map (s =>ping (s.u ))); servers.forEach ((s,i )=> { const delay = res[i]; const delayColor = getDelayColor (delay); const span = buttons[i].querySelector ('span' ); span.textContent = delay !== null ? delay + ' ms' :'-1 ms' ; span.style .backgroundColor = delayColor; }); })(); </script > </body > </html >
然后,我们需要将这段代码保存为项目目录的source/static/route.html,但Hexo对html页面会自动渲染,套用页面的模板,很明显违背了我的本意,所以我需要处理这点,下一节放代码。
2.2 防止Hexo自作聪明渲染html代码 Hexo的项目目录下,有一个skip_render的配置项,我选择用这一项的功能(跳过对source/目录下的特定目录或者文件的渲染)
1 skip_render: "static/**"
这段代码的语义是:将source/static下的任何文件都不渲染,原样复制到public/目录。
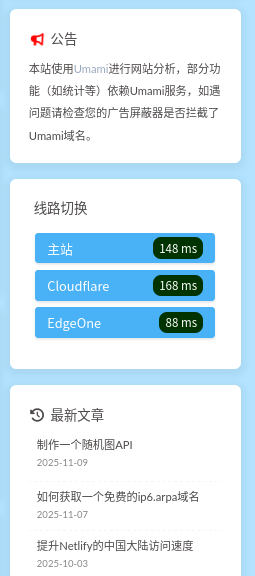
3.完结撒花 写好这一切后,执行以下hexo s观察一下样式是否正常,观察到样式是这样的,符合预期,一切便结束了(撒花.webp)
3.1 细节说明 Q1:我的网站部分线路没有设置CORS怎么办?fetch 的 then 和 catch 仍会触发,可以通过 performance.now() 计算延迟。
Q2:你的自定义方法靠谱么?我放在GitHub上的的Hexo ,经过测试是没有观测到问题的。
Q3:我没有static和_data目录怎么办?
3.2 参见 自定義側邊欄 | Butterfly 我的Hexo项目